.png)


Table of contents:
What equipment is needed for a podcast?
Considerations when choosing the best podcast microphone
Podcast microphone recommendations
Considerations when choosing the best podcast headphones
Podcast headphones recommendations
Considerations when choosing the best podcast computers
Podcast laptop and computer recommendations
Considerations when choosing the best podcast cameras
Podcast camera recommendations
Bonus: Best additional podcast equipment for more advanced setups
Getting the most out of your podcasting equipment with the right recording and editing software
Key takeaways:
- Essential podcast equipment for beginners: The basic equipment needed is a microphone, headphones, and a solid recording rig.
- Additional equipment: More advanced podcasters can dive into audio interfaces, microphone arms/stands, shock mounts, and pop filters to make your podcast setup better.
- Microphone specs: External mics are the best option. USB ones are a good entry point but look for an XLR one for professional quality.
- Headphones specs: Look for headphones with an ample frequency range to catch even the faintest background noise. Closed-back headphones are generally preferable, but they should be comfortable to wear for a long time.
- Laptop choices are plentiful: Try to pick one with high processing power, at least 8GB of RAM, and no less than 512GB of storage space.
- Mirrorless cameras: They are generally superior for podcasting, but make sure they offer a resolution of no less than 1080p.
Are you eager to start your podcasting journey but hesitant to break the bank on expensive equipment?
We hear you. Choosing the wrong setup can lead to hours of frustration and wasted money (and a podcast that sounds like it was recorded in a tin can).
Don’t worry. You don't need everything the pros are pushing on YouTube. We'll help you understand what to look for when buying podcasting gear and offer top picks for every budget – from shoestring to splurge.
Let’s get into it!
What equipment is needed for a podcast?
No matter where you are on your podcasting journey, the non-negotiables your setup should include are a microphone, headphones, a camera (for video podcasts), and a good computer to run them all.
Let’s see why first.
Microphone
A podcast is all about the listening experience. That much is clear. If your voice sounds like you’re talking in an underwater cave, you’re not poised for success, are you?
The microphone is the most critical tool for capturing high-quality audio. It’s your blacksmith’s hammer and your miner’s pickaxe. Don’t cheap out on it.
Headphones
Before you ask it: No, your AirPods won't cut it. You need proper headphones to monitor audio quality, and they must be good enough to catch barely audible issues like background noises or distortion. Don’t let the perfect interview be ruined when you discover that your neighbor's dog was barking the whole time.
Computer or laptop
Your computer will be your command center for recording, editing, and managing files. Whether you use a Windows PC, Mac, desktop, or laptop, your rig must be powerful enough to run all your software, from recording to editing.
Camera (for video podcasts)
If you're doing a video podcast, you'll also need a good camera. Since you’ll be showing your face, you want to look good.
These five items form the backbone of any podcasting setup, ensuring professional quality for your listeners (or viewers).
Here are some things to look for when choosing equipment and a few of our top picks in each category.
Considerations when choosing the best podcast microphone
An external podcast microphone can go a long way to delivering professional-quality sound. Here’s what to consider when you’re choosing one.
USB vs. XLR
Are you a beginner? Then USB mics are a better entry point. They're simple – just plug the USB into your computer, and you're ready to record.
If you want to improve your sound, XLR mics are better. Seasoned professionals often use them. You will need an audio interface to connect to your computer, but it’s worth it. XLR mics offer superior audio quality and more control over the sound.
Understanding polar patterns
The polar pattern determines the directionality of the microphone. Consider how you’ll use your mic to determine what’s best for you:
- Cardioid mics pick up sound primarily from the front. They’re ideal for single-person or multi-person podcasts where each person has their own mic.
- Omnidirectional mics pick up sound from all directions. They’re best for interviews and group recordings, but you must record in a quiet environment to avoid picking up background noise.
- Bidirectional mics pick up sound from the front and back. They’re best for two-person interviews, but you’ll want to record in a quiet setup.
The ideal setup is to have a cardioid mic for each person, but if this isn’t an option, you can try the other types.
Dynamic vs. Condenser
Dynamic mics are durable and less sensitive to background noise. This makes them perfect for outdoor and noisy environments.
Condenser mics have higher sensitivity and audio quality, making them suited to controlled studio settings.
Frequency range
A microphone's frequency range indicates the range of sound frequencies it can capture. A wider frequency range allows for more detailed and natural sound reproduction.
A range that covers the human voice well (approximately 20 Hz to 20 kHz) is ideal for podcasting.
Resolution
Resolution refers to how well the microphone can capture detailed and nuanced audio. This includes the mic’s frequency response and sensitivity, determining how accurately the mic can reproduce sound. Look for a mic that supports at least 16-bit recording and a 48 kHz sample rate.
Best podcast microphone recommendations
.webp)
Low budget - Razer Seiren V3 Mini
The Razer Seiren Mini is a compact, budget-friendly USB microphone designed for streamers and podcasters who need great sound without taking up too much space. It features a super-cardioid pickup pattern, which helps isolate your voice while minimizing background noise. Its small size, tap-to-mute function, and easy plug-and-play setup make it ideal for beginners or those with limited space. The Razer Seiren Mini typically costs around $59.99.
Mid Budget - Blue Yeti USB Mic
The Blue Yeti is a popular choice among mid-budget podcasters. It can be adjusted with multiple polar patterns (cardioid, bidirectional, omnidirectional, stereo). With omnidirectional directionality, you can record the whole room, picking up even the faintest noise (if you want). The built-in Blue VO!CE software allows you to add vocal effects to your recordings, and it’s a Logitech product, so you can trust it’s reliable and built to last. The Blue Yet comes at a $129.99 price tag.
High Budget - Shure SM7B
The Shure SM7B studio recording mic is popular among professionals. Its cardioid polar pattern and high-frequency range make it perfect for recording vocals nearby. It features advanced electromagnetic shielding to reduce hums, an internal air suspension shock isolation to minimize mechanical noise, and a pop filter to reduce plosives. Precise mid-range control is ensured by its built-in bass roll-off. At a $399.00 price point, you can rest assured you’re getting the best money you can buy.
Read more in our list of the best podcast microphones.
Considerations when choosing the best podcast headphones
Podcasters typically wear headphones to monitor audio quality and avoid echo and feedback between the speakers and the mic. Here’s what to look for when choosing a set of headphones, plus some of our favorite options.
Frequency range
The frequency range of headphones determines whether you can clearly hear the full spectrum of your recorded sound. Look for headphones with a frequency range of at least 20 Hz to 20 kHz. While headphones designed for professional use should cover at least this range, cheaper or more basic headphones may not.
Open vs. closed-back headphones
Open-back headphones allow air to pass through the ear cups, while closed-back headphones seal the sound.
For podcasting, you need to monitor sound accurately. Opt for closed-back headphones, as these prevent sound from leaking out and external noise from entering. They allow you to focus solely on the audio being recorded or edited without distractions from ambient noise.
Open-back headphones provide a more natural and spacious sound but leak sound and offer less isolation. They’re better for mixing and mastering.
Comfort and fit
Making a podcast involves long hours of recording and editing. To endure these moments, you’ll want comfy headphones that don’t hurt your ears.
For maximum comfort, choose headphones with soft earpads and headband padding. Also, look for headphones with a secure fit.
Portability and storage
If you need to transport your headphones frequently, consider those that are smaller and lighter or foldable.
Wired vs. wireless
Wired headphones are recommended for podcasting to avoid audio delays and ensure consistent sound quality.
Microphone type (attached or not)
Some headphones come with an attached mic. These mics are better suited for live-streaming, but you can use them for podcasts. Since you don’t need to purchase an additional mic, such headphones are fabulous for podcasters on a budget. However, standalone mics generally offer better audio quality for recording.
Best podcast headphones recommendations
.webp)
Low budget - Audio Technica ATH-m20x
The ATH-m20xs are great entry-level closed-back headphones. Their lightweight yet durable plastic build makes them comfortable for extended use. Featuring 40mm drivers with rare earth magnets, they deliver clear sound with enhanced low-frequency performance. At just $49.00, they are an excellent choice for budget-conscious podcasters.
Mid budget - Sony MDR7506
The Sony MDR7506 is known for its sound quality, comfort, and durability. Its accurate and well-balanced audio reproduction focuses on clear mids and tight bass. Its robust construction and gold-plated 3.5mm connectors add reliability, but its lightweight build (it weighs only 8 ounces) makes it ideal for long sessions. The Sony MDR7506 is priced at only $99.99, so it is still very affordable for the value it offers.
High budget - Shure SRH1540
Another Shure product on the high-tier list of best products, the SRH1540, features a sturdy, stylish build with excellent sound quality. This over-ear headphone has a frequency range of 5Hz—25kHz, giving you detailed audio reproduction to monitor audio as precisely as possible. The aluminum alloy and carbon fiber frame make it incredibly durable and lightweight, and the complex carrying case is what you need for all your out-of-studio podcasts. The price is $499, but the Shure SRH1540 is worth every dollar.
Check out our list of the best podcast headphones.
Considerations when choosing the best podcast computers
While you can record a podcast on other devices (like your smartphone), using a computer or laptop gives you more options and helps you create a higher-quality podcast. Here’s the basic setup we recommend.
CPU
Your CPU, or central processing unit, handles the instructions for performing computer tasks. More complex or demanding tasks will require more processing power.
Podcasting often involves audio (and sometimes video) editing, so a powerful processor is key. Think Core i5/i7 or Apple M1/M2 for smoother editing and faster rendering. These processors handle Digital Audio Workstations (DAWs) and video editing software like a breeze.
RAM
Random Access Memory (RAM) stores any data that you’re currently working on.
The more memory your computer has, the larger files it can handle. This is essential for multitasking and handling large audio or video files.
At minimum, 8 GB of RAM is recommended, but 16 GB is ideal for more extensive tasks and future-proofing setup.
Storage
Solid State Drives (SSDs) should always be preferred over Hard Disk Drives (HDDs).
SSDs use flash memory, which allows them to read and write data faster. They don’t need defragmentation, making them quieter for a recording environment. Aim for at least 512 GB or 1 TB of storage.
Portability
If you need to record on the go, get a small, lightweight laptop that’s easy to carry.
Battery life (for laptops)
Again, if you want to record while on the move, you’ll want a long battery life to avoid interruptions during recording sessions.
Another option is to get a portable laptop battery charger (with a long cable).
Operating system
Choose an operating system that’s compatible with your preferred recording and editing software. For instance, Logic Pro and GarageBand are exclusive to macOS, while other options like Audacity and Reaper are cross-platform.
Riverside is browser-based, so don’t worry about us – we get along well with all systems.
Best podcast computer and laptop recommendations
.webp)
Low budget - Acer Aspire 5
The Acer Aspire 5 is excellent for those on a tighter budget. Powered by an Intel Core i5-13420H processor supported by 16GB of RAM, it has excellent processing power and more than enough to run DAWs and editing software smoothly. It comes equipped with a 512GB SSD drive, so internal storage is sufficient. Screen size is a standard 15’’, so you may want to upgrade your rig later by connecting it to a larger external monitor for detailed video editing. Weighing less than 4 pounds, the Acer Aspire 5 is lightweight and agile, and for just $490.79, it’s incredibly affordable with such powerful tech specs.
Mid-budget - Apple MacBook Air
Want to purchase an Apple laptop without breaking the bank? The MacBook Air comes at a reasonable price and can run resource-intensive software with no trouble. Powered by the Apple M-series chips, it delivers exceptional audio editing performance and the trademark exceptionally long battery life of all MacBooks. Light and compact, the only downside of the MacBook Air is probably its 13’’ screen, although the Retina display provides crisp visuals for detailed work. The price is $999 if equipped with an M2 chip and an extra $100 if you want to mount an M3.
High-budget - Apple MacBook Pro
Want to completely future-proof your podcast editing and ensure your editing software doesn’t bog down your system? Then bet on the MacBook Pro – a real powerhouse laptop tailored for professional podcasters who don't have to try too hard. Prices for MacBook Pros range from $1,599 to 3,499, depending on the configuration and screen size (14’’ or 16’’). We suggest you buy the $1,999 with an M4 chip, 14’’ screen, and 1TB SSD storage, as more expensive models are likely overkill for podcasting.
Check our in-depth guide of the best laptops for podcasting.
Considerations when choosing the best podcast cameras
If you’re recording a video podcast, you’ll want a good camera to ensure you and your guests look their best. Here’s what to look for when buying one, along with a few of our favorite cameras.
Type of camera
Modern smartphones, like iPhones, have capable cameras. So, if you have one, that’s a great starting point.
Webcams are a decent option for creating podcasts using a computer at home. However, the video quality they capture won’t be as good as those from DSLR cameras.
DSLR and mirrorless cameras are the best, although they’re also quite expensive. They’re great for more professional, in-person settings.
Video resolution
Video resolution refers to the amount of detail in your video. The number of pixels on your screen measures it. The more pixels, the more detail.
Try to get a camera with a minimum resolution of 1080p. If you have the budget, 4K capability is recommended. A higher resolution will give you better quality and more editing flexibility.
Frame rate
Frame rate refers to the number of still images shown in a video per second.
A higher frame rate (60 fps) provides smoother motion, but 30 fps is usually sufficient for podcasts.
Autofocus
A fast and reliable autofocus is crucial to keep you in focus as you move or gesture during your podcast.
Low light performance
If you plan to record in dimly lit environments, consider getting a camera with good low-light performance. Cameras with larger sensors generally perform better in low light.
Portability
For on-the-go recording, get a durable and lightweight camera for travel.
Best podcast camera recommendations
.webp)
Low budget - Logitech C922 Pro Stream Webcam
The Logitech C922 offers 1080p video quality at 60fps, automatic low-light correction, and autofocus. It’s a reliable and affordable choice for beginner podcasters, and it’s a plug-and-play device, so you don’t even need to configure it. It features a 78-degree field of view, a compact design, and a tripod to make positioning it even easier. For just $99.99, it’s an excellent product that will last until you decide to step up your game.
Note: If you're using a Logitech webcam with Riverside, please follow our Logitech guidelines.
Mid budget - Panasonic Lumix G7
The Panasonic G7 is one of the best mid-budget mirrorless 4K cameras on the market. It performs well in low-light conditions, with ISO sensitivity up to 25600, and in bright sunlight. Its autofocus ensures your guests remain clearly in the frame, even while they move. The camera also supports Wi-Fi connectivity for remote control and file transfer. A Panasonic Lumix G7 costs $549.99.
High budget - Sony Alpha ZV-E1
The Sony Alpha ZV-E1 is a full-frame mirrorless camera capable of recording 4K video up to 120fps or 240fps at 1080p. It is compact and lightweight, making it great for traveling. It also has excellent image stabilization, which helps maintain stable footage even while moving. Connectivity options include USB-C, micro-HDMI, Wi-Fi, and Bluetooth for seamless integration with any streaming and recording setup. The price is $1,899.99.
Find the perfect camera with our podcast camera guide.
Bonus: Best additional podcast equipment for more advanced setups
If you’re a more advanced podcaster, you might want additional equipment to help you polish your podcast even more.
Here are some things to look for when choosing video and audio equipment. You can also check out a few of our top picks for each category!
Audio recording equipment
If you want to improve your audio, here are a few additional things you might want to add to your setup.
Audio interface

An audio interface is a bridge between your computer and audio sources (microphones, instruments). It acts like a computer and music gear translator, converting analog signals into digital data. Their price is usually quite affordable, and some of them are portable enough if you’re recording on the go.
An audio interface gives better sound quality than USB mics. As a bonus, it lets you use XLR mics, which sound superior to USB mics.
Recommendation:
The Focusrite Scarlett 2i2 is a popular 2-in/2-out USB interface with high-quality preamps that produce clean, clear audio. Its low latency performance lets you monitor in real time without distracting delays. The latest-generation Focusrite Scarlett 2i2 (4th generation) is quite budget-friendly at just $199, but if you want to save some money, you can look for a 3rd-gen.
Check out our guide on the best USB audio interfaces.
Microphone arms and stands

A microphone arm is a mount typically attaches to a desk, table, or other surface. It features a movable arm that allows the microphone to be positioned.
A microphone stand is a freestanding structure designed to hold a microphone securely. Before purchasing one, check its weight capacity to ensure it can support the weight of your mic.
High-quality microphone stands offer a wide range of motion and adjustability and even feature built-in noise/vibration dampening.
Recommendations:
- Microphone arm - Heil PL-2T
The Heil PL-2T is a professional-grade microphone boom arm with a weight capacity of up to 3.5 lbs and features. The arm includes a hidden channel for cable management, an internal spring for silent positioning, and a durable all-metal frame. The Heil PL-2T is priced at $115.
- Microphone stand - MC-125 Studio Series Mic Stand
The MC-125 Studio Series Mic Stand is a professional-grade microphone stand with an adjustable height range of 51.5 to 82 inches and a telescoping boom arm. It is sturdy and rugged and has a maximum weight capacity of 20 lbs, making it suitable for supporting heavy microphones and other studio accessories. Ultimate Support officially sells the MC-125 for $299.99.
Check out our suggestions on the best microphone arms and microphone stands.
Shock mounts

A shock mount attaches your microphone to a mic stand or boom arm and protects it from shock or vibrations. However, shock mounts aren’t universal for all microphones, so check the microphone compatibility first.
Recommendation:
The Rycote Invision USM Shock Mount provides superior shock absorption without traditional elastic bands, meaning it will never sag or need rethreading. It accommodates microphones with diameters ranging from 18 to 55 mm and weights up to 1.65 lbs. You can find it on Amazon for just $80.
Check out our microphone shock mount recommendations.
Pop filter

A pop filter protects against popping sounds caused by plosives in your speech, the sounds you get when pronouncing hard consonants such as “p” or “b.”
Nylon pop filters are the most common and affordable, but if you’re looking for a higher-priced option with better sound quality, consider metal mesh. Make sure to check for a pop filter size that matches the size of your mic and, if possible, a curved shape that provides more freedom and range of movement.
Recommendation:
The Nady MPF-6 is a professional pop filter with a 6-inch dual-layer nylon screen that effectively diffuses air blasts. Lightweight and durable, it can be positioned with great precision thanks to its stand mount clip and flexible 13-inch gooseneck. An MPF-6 usually costs between $25 and $30, making it suitable for all budgets.
Read more in our list of the best pop filters.
Video recording equipment
If you’re recording video podcasts, a few other pieces of equipment will help you improve your setup.
Video lighting

Video lighting illuminates subjects and scenes to enhance a video production's visual quality and mood. Depending on your studio's style, you can choose different color temperatures (cool or warm) and a more vigorous light intensity. If you don’t want too many cables, some lights are battery-powered or come with detachable USB rechargers.
Commonly used video lighting equipment includes:
- LED panels
- Softboxes
- Ring lights
- On-camera lights
Recommendation:
The Limostudio Continuous Lighting Kit is a comprehensive and affordable solution to improve your studio lighting. It includes three 45W daylight-balanced (6500K) CFL bulbs for soft, natural illumination, four 33-inch white, black, and silver umbrellas for light diffusion and reflection, two 86-inch adjustable light stands, and a 28-inch tabletop stands for flexible positioning. You can usually find a Limostudio’s Continuous Lighting Kit for less than $70 (more if you want more powerful lights).
Learn more in our complete guide on video lighting.
Tripod
.png)
A tripod supports and stabilizes a camera while filming, helping to prevent camera shake and shoot steady shots. Tripods come with different types of heads (ball head, 3-way head, fluid head, etc.), weight capacities, and extendable heights.
Recommendation:
Manfrotto BeFree Live Lever Kit
The Manfrotto BeFree Live Lever Kit is a compact and lightweight aluminum tripod system with a fluid drag video head for smooth pan and tilt movements. It can support a load of 8.8 lbs and has a maximum height of 59.1 inches. It can also be folded to 16.9 inches for easy portability. For as little as $200, you can purchase a Manfrotto BeFree Live Lever Kit.
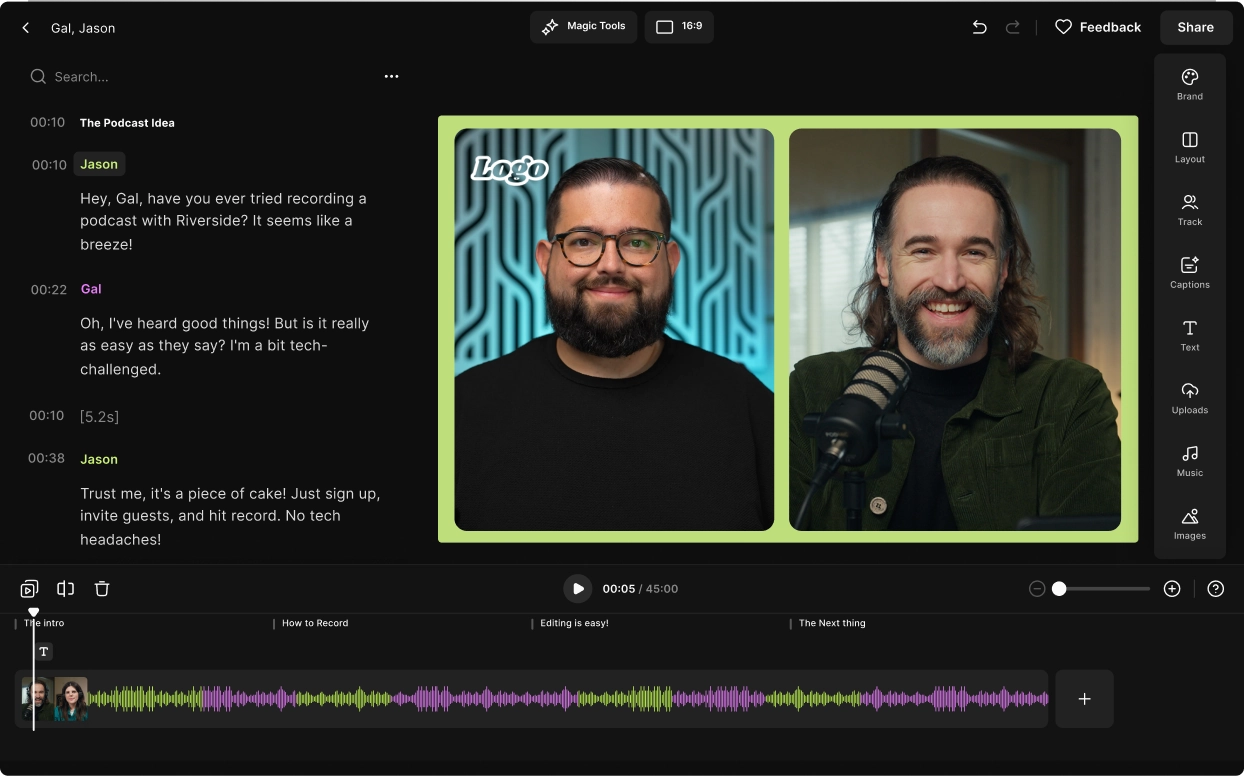
Get the most out of your equipment with the right podcast recording and editing software
No matter how good (and expensive) your podcasting equipment is, your podcast won't look great if the recording software you chose is compressing everything into a pixelated blur.
We’ve all been there. Nothing is more disheartening than watching a premium camera's potential wasted by low-quality recordings. That’s why we built Riverside to get the best out of pretty much any gear you throw at it, with uncompressed 4K video and 48kHz audio quality output.
It doesn’t matter, even if you don’t have the budget for a top-tier, $500 mic. Riverside’s Magic Audio is an AI audio enhancer will make your $50 mic sound like you’re recording in a professional-grade studio in just a few clicks – no need to become an amateur audio engineer. And don’t worry, it’s not “magic,” just really good tech.
The best part? Everything lives in one place—no more jumping between recording software and editing tools. Just click the “record” button, make your gear shine, edit your content with our text-based editor, and even repurpose it into blog posts, social posts, and short clips.
Because let's face it – you bought that equipment to create amazing content, not to watch its quality get butchered by some clunky recording software.
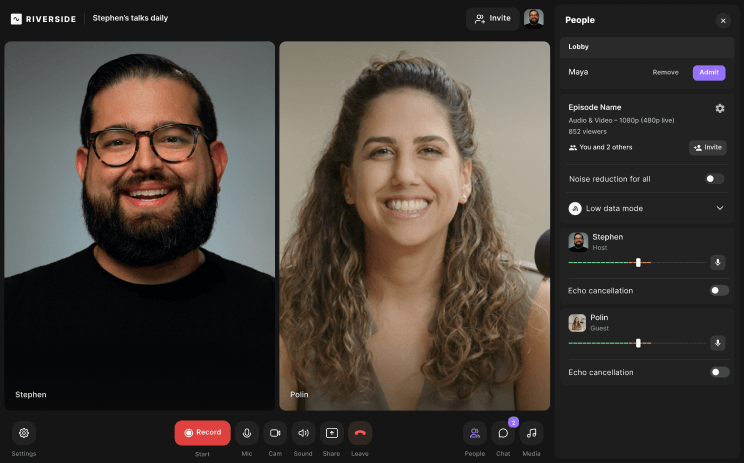
How to set up a studio recording with Riverside
Step 1: Log in to Riverside.
Step 2: Click on the “+” icon next to “Studios” at the top left of the screen.
Step 3: Give your studio a name that reflects your podcast. Choose whether to record video and audio, or audio only, and choose your transcription language.
Step 4: Click the purple “Record” option above. In the lobby, add your name, choose the correct camera settings, and select whether you have headphones or not. Then click “Join Studio.”
Step 5: If you want to invite guests, click on the “Invite” icon and enter the email addresses of your guests. Alternatively, you can copy the studio link and share it with your guests directly.
Step 6: Once your participants have joined, hit “Record” and create your amazing podcast!

FAQs on Podcast Equipment
Still need information? Here are the answers to some frequently asked questions.
How much does it cost to start a podcast?
You can start a podcast using your phone or computer’s built-in recorder.
However, to improve your sound and sound more professionally, you should expect to invest at least $70-$100 to start. This usually covers a decent microphone (around $50) and a basic hosting plan (around $15 monthly).
If you want top-notch audio quality and advanced editing tools, the cost could be $500 or even $1000.
Remember, it's all about finding the right balance between quality and your budget.
Do I need a microphone to start a podcast?
You can start a podcast using the built-in microphone on your smartphone or laptop. Many people do this to begin their podcasting journeys.
However, the microphone is the most crucial equipment you can get, for starters. It’s relatively inexpensive and will improve your sound quality.
Can I record a podcast on my phone?
Yes, you absolutely can! Modern smartphones, including iPhones and many Android devices, feature top-quality cameras often superior to many low- and mid-budget cams. iPhones even support Continuity Camera, which lets you use your phone as a webcam and nicely integrates with your desktop computer.
While most phones’ mics can record at an average quality, if you're serious about improving your podcast, investing in an external microphone will probably be your next step.